Our
Setup Node.js App feature allows for the choosing a specific version of Node.js in order to run the apps using Node.js 6.x, 8.x, 9.x, 10.x, 11.x, 12.x, and 14.x versions. The currently
available Node.js version pool on our Shared servers is available at
this page.
This function provides ultimate flexibility and features a user-friendly interface that helps you get faster acquainted with the new functionality it offers.
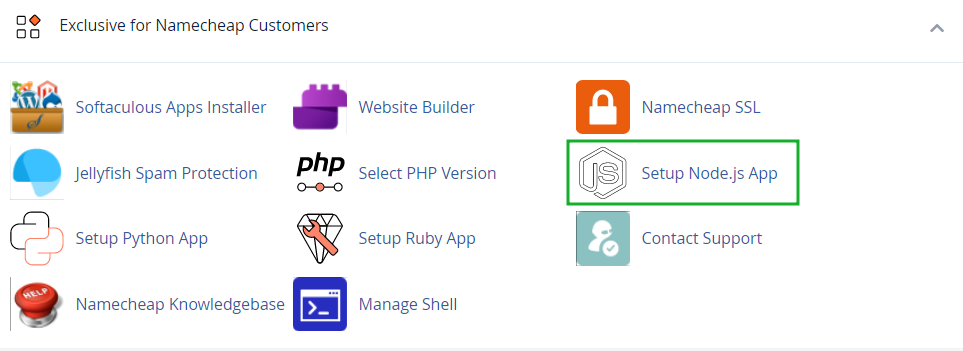
In order to access the application, open cPanel >> Setup Node.js App.
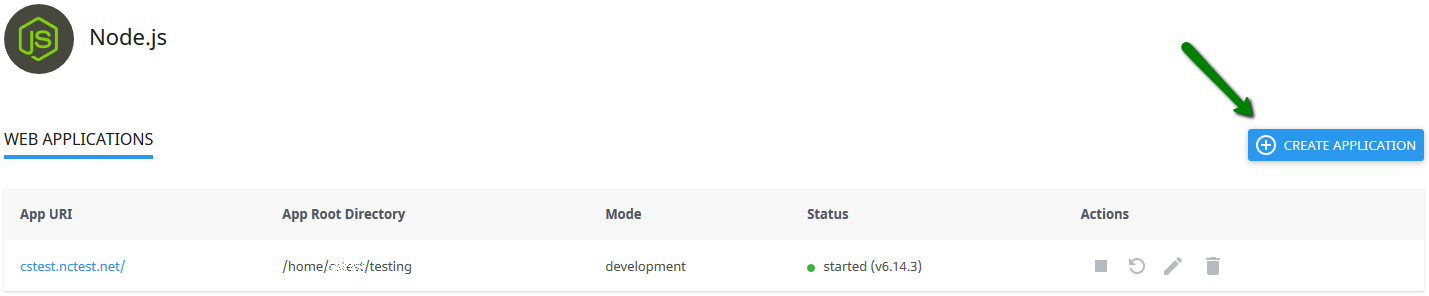
The following interface will be displayed there:

Please note there are several columns in the list:
- App URI (application URI including the domain name)
- App Root Directory (root directory of the application)
- Mode (can be production or development)
- Status - started/stopped (displays if an application is running or not and version of the application)
- Actions (allows to start, restart, stop, edit, and remove a particular application)
There is also an option to create a new application.
Create application
If you wish to create a new application, go to the cPanel >> Setup Node.js App >> Create application.
On the next page you will see the following fields:
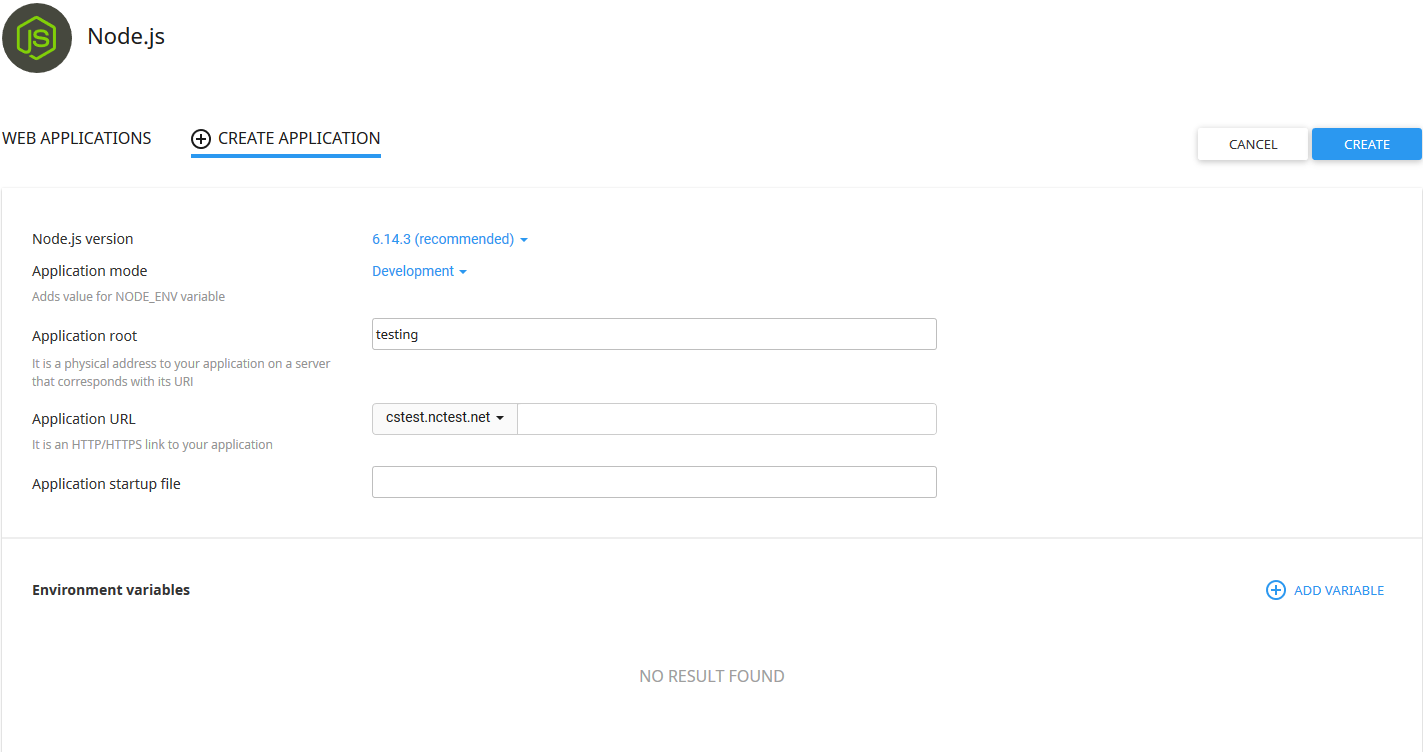
It is possible to choose the following parameters:
- Node.js version
- Application mode (available modes are Production and Development)
- Application root (the path to the application on a server that corresponds with its URI. You can enter either the existing folder or specify a new folder that will be created in the root directory of that domain)
- Application URL (fill in an HTTP/HTTPS link to the application)
- Application startup file (use the NAME.js format)
If you wish to add environment variables, click
Add Variable to specify a name and a value.
After the application is created, you will be prompted to the application dashboard.
As soon as the environment is set, you can upload your application files to the application root directory.
In case you need to install some modules, it is possible to do this after
entering the virtual environment of the application
via SSH. The command for this is mentioned on the application page:

If there are any issues with installing a module, contact
our Support team for help.
Manage application
With the help of the Actions section, you can manage the application in the following way:
To
start a stopped application, do the following:
1. Click the
Start icon in the
Actions column in the stopped application row.

2. Note that when an action is completed the Start icon changes to the Stop icon.

To
stop a started application, do the following:
1. Click the
Stop icon in the
Actions column in the started application row.
2. Note that when an action is completed the
Stop icon changes to the
Start icon.
To
restart a started application, click the
Restart icon in the
Actions column in the started application row.

PLEASE NOTE: During the restart, it won’t be possible to perform any actions with the app.
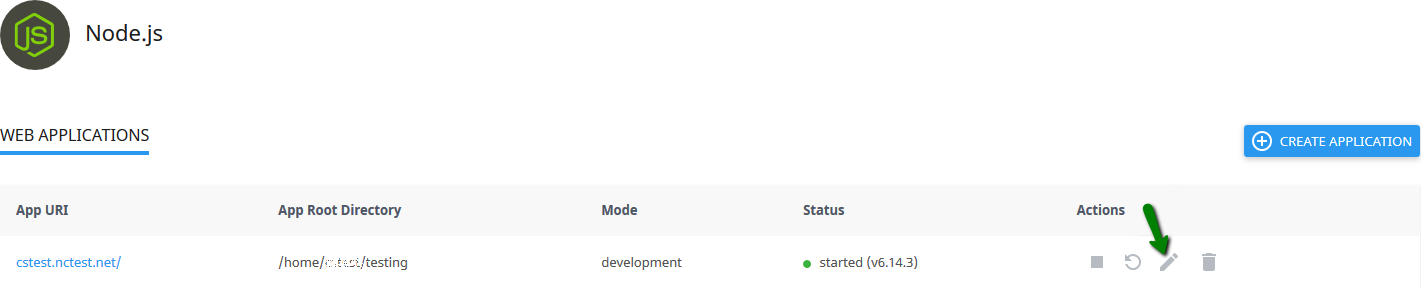
To
edit the application, open
cPanel >> Setup Node.js App and click the
Pencil icon in the
Actions column in the respective application row.
The editing menu looks like the following:
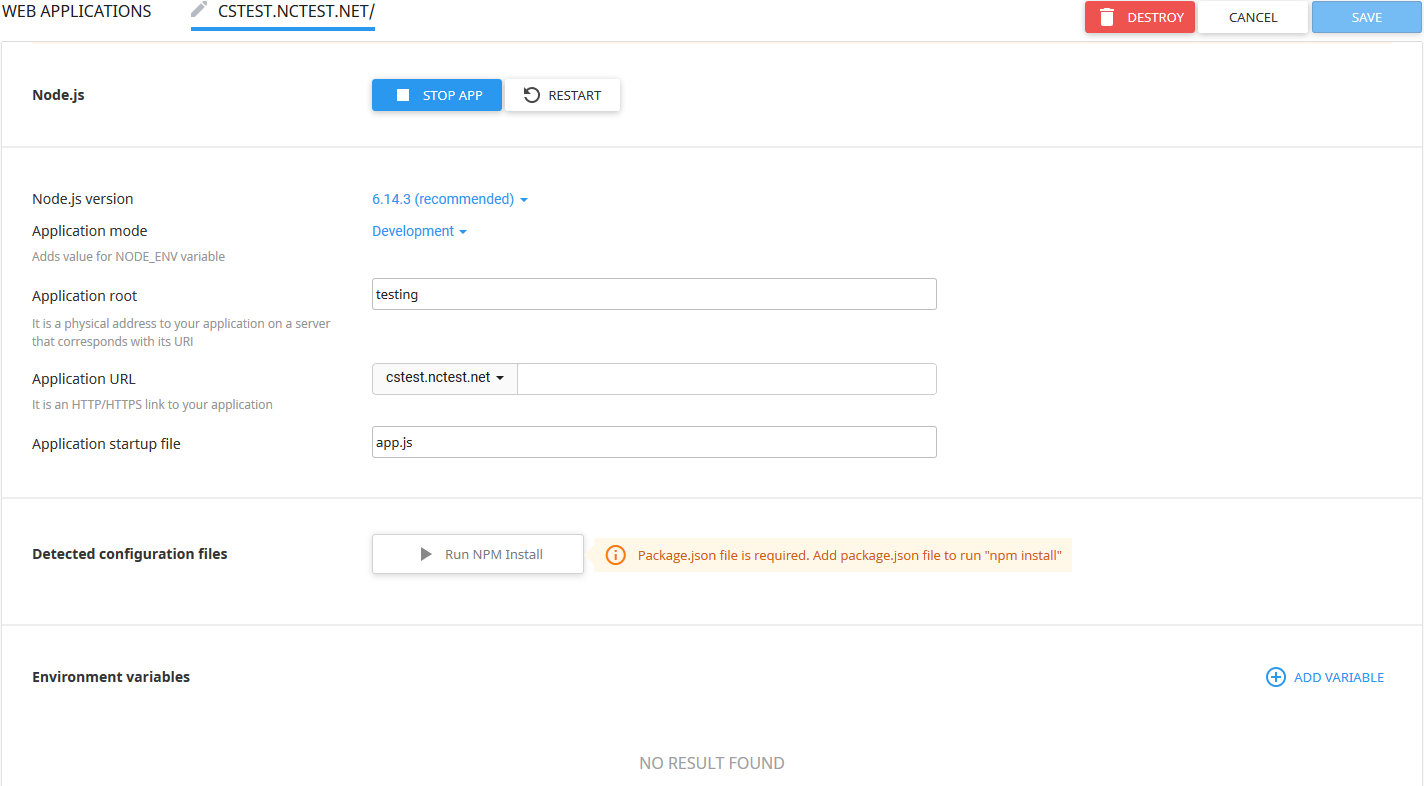
To enter the virtual environment via SSH, run the highlighted command mentioned on the top of the page.
Using this menu, you can manage the created application in the following ways:
- Restarting the application
- Stopping the application
- Destroying the application
- Changing the Node.js version (this version switch can take up to 5 minutes)
- Changing the Application mode from Production to Development (vice versa)
- Modifying the Application root
- Modifying the Application URL (specify in a field an HTTP/HTTPS link to the application)
- Modifying the Application startup file (specify as NAME.js file)
- Running NPM install command (click the Run NPM Install button to install the package(s) described in the package.json file)
- Adding Environment variables
To
remove a started application, click the
Bin icon in the
Actions column in the respective application row.

PLEASE NOTE: When this action is completed, the application will be removed from the Web Applications table and you should see a confirmation pop-up displayed on your screen.
